Troubleshooter’s Guide to Google Campaign Manager Ad Tags

Google Campaign Manager (GCM) is an ad server within Google’s Marketing Platform. It allows marketers and agencies to host and manage their digital advertising all in one place and review creative performance in real-time.
Using GCM, marketers manually create tracking assets called “ad tags”, which are delivered by a media partner. When an ad request is initiated, the tag downloads the creative from GCM and counts an impression. Similarly, if a user clicks, interacts with an ad or takes an action resulting in a conversion, those requests are tracked by GCM and available in reporting, it can be difficult to detect issues and manage discrepancies in reporting. This article helps identify common critical problems, so they can be resolved quickly.
Trafficking and Ad Setup
Prior to launch, campaigns are manually setup with order details and ads must be assigned in the GCM interface. While there are features to bulk upload and edit details, it is an intensive and detailed process, and easy to mix up. The pre-launch process is often managed by many different teams spanning multiple disconnected systems. Some recommended steps to mitigate error:
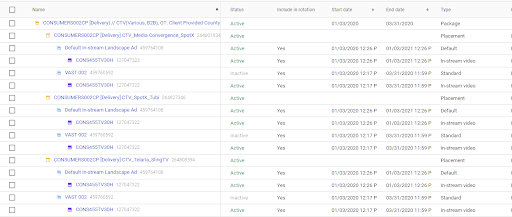
Review media placements prior to launch. Marketers can export their media plan including the ad-level details from the Campaign dashboard by clicking ‘Export’. This provides a line-by-line breakdown of all assignments so teams can validate everything is assigned correctly.

Review Creative Assignments. Ad weights and rotations can be managed evenly, sequentially, or optimized-based on click or conversion.

Review Event Tags. If campaigns are including any third-party tracking (such as for third-party verification or another measurement), ensure event tags have been correctly defined under Advertiser settings and assigned at the Ad level. Without this, activity may be recorded by GCM but not by the third party.
Impression Issues
Impression delivery is handled differently between the media partner and GCM. An impression is counted by the partner’s ad server when an ad begins to render, whereas GCM will count only when their ad tag successfully downloads and meets Google’s criteria for a valid impression. As methodologies differ, counts will always be different, but marketers can minimize this inevitable discrepancy by following a few guidelines:
Modify tags for Cache-busting Certain GCM ad tags include a [timestamp]. This should always be replaced by the partner ad server’s cache-busting token. This replaces the [ ] string with a random number and helps ensure every ad request is uniquely counted and not cached by the web browser.
Example:
<SCRIPT language=’JavaScript1.1′ SRC=”https://ad.doubleclick.net/ddm/adj/N12345.1234567/B12345.123456;sz=300×250;ord=[timestamp];dc_lat=;dc_rdid=;tag_for_child_directed_treatment=;tfua=?”>
</SCRIPT>
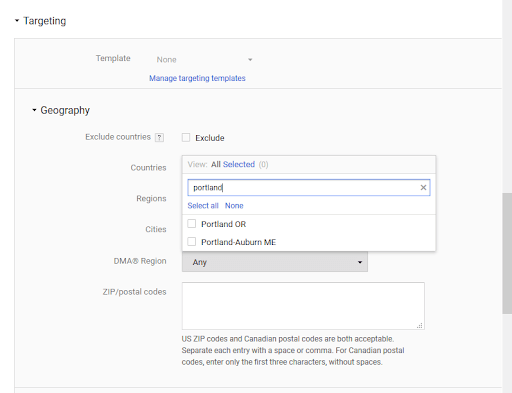
Align Geo-Targeting. While both GCM and publisher-side ad servers support geo-targeting, there may be differences in how users are recognized by each system. Google uses its own data on IP to target users, whereas other ad servers may use different non-Google databases or other ways of qualifying geolocation, such as registration data. Consider how users are geolocated by each system and verify targets are aligned. Also double-check for potential when assigning targets (Portland, Maine ≠ Portland, Oregon!)

Align Dayparts and Creative Scheduling. Similar to targeting, users can define dayparts and run dates both on the partner side and within GCM. It’s important to ensure impressions and schedules are booked according to the media plan. If media runs too early or too late, those impressions are generally not credited and may result in running default ads (ineligible placeholder ads) within GCM.
Click Issues
As with impression delivery, click discrepancies are common as handling for clicks is treated differently by each system. Click filtration, or the removal of automated robotic clicks, from duplicated clicks, spiders and other non-human traffic are filtered out by Google and may not be removed automatically by a partner’s ad server. Time zones may also important to check when reviewing differences. Below are some recommendations to avoid click tracking issues:
ClickTags. ClickTags are standardized events coded into a display banner. They must be present for Google to recognize the user event as a click. If this is missing, it will not be counted. To avoid issues, designers should insure their ads are properly coded for GCM using Google’s HTML5 validator: https://h5validator.appspot.com/dcm/asset
Click Macros. Click macros are partner-side tokens that allow their ad server to track the click. Without this, the click may be recorded by Google but not captured by the publisher. Each token differs, so partners should check publisher-side ad server documentation for proper implementation.

3rd Party Click Tracking. In addition to differences between GCM and publisher-side click counts, there may be other 3rd parties involved in counting clicks. These can include independent verification vendors (such as DoubleVerify or Integral Ad Sciences) where click redirects are prepended to validate clicks, or simple Google Analytics UTM query strings appended after a landing page (http://www.example.com/?utm_source=claravine, e.g.). If these are omitted in GCM or incorrectly applied, they will not track correctly. Marketers should verify these are placed before issuing tags to their media partners.
Conversion Issues
GCM’s “Floodlight” JavaScript tags are used to track conversion activity on a website. To track web-based conversions, two tags must be placed:
Global Tag. Placed in the tag of a marketer’s HTML. This must be included on all pages of the website.
Event Snippet. Placed in below the Global Tag. This should be coded on the conversion action (Thank You page load, form submission etc.) If a marketer is tracking revenue or other key custom data on conversion, this must be included in the event snippet.
As with impression and click-based discrepancies, Floodlights and partner-side counts have natural methodology differences. To minimize issues and discrepancies, review the following:
- Google’s Tag Assistant (Chrome extension). A marketer can verify that their tags are firing correctly on a website before a campaign is set to launch.
To test, enable the Tag Assistant and complete a conversion prior to campaign launch. If successfully recorded, the Floodlight tag Category and IDs will display.
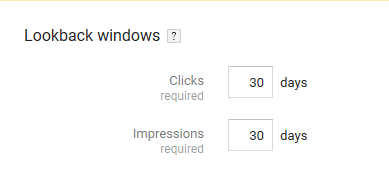
To test other conversion tags, open any web debugger and review the Network panel to verify the tag is loaded on the same event. - Review Lookback Windows for Attribution. An attribution window is the maximum length of time a user will be credited for conversion if they view or click on an ad. GCM has a 30-day lookback for post-view and post-click conversions, but other partners may vary. This can be modified at the Advertiser settings level (under Floodlight configuration.) To minimize discrepancies, align lookback windows as best possible.

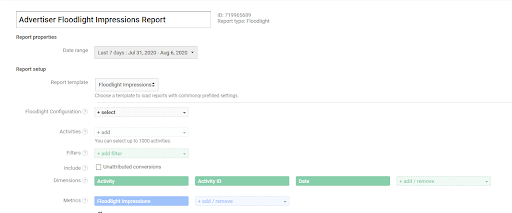
- Verify Conversion Tags have not been removed within flight. As code changes may happen on a marketer’s website, it’s important to verify that Floodlight tags have not been removed or that sudden changes (like server downtime) have not disrupted tracking during a campaign. To verify this, marketers can use the Floodlight Impression report in GCM. This is available in the Offline Report Builder under Floodlight reporting. Under report setup, one can filter to their Floodlight event, choose the template labeled ‘Floodlight Impressions’ and enable Unattributed Conversions. This will indicate how many times a Floodlight has been requested. By including a Date dimension, marketers can see if their Floodlight tag may have been removed suddenly.

- Verify that revenue or other custom data is being passed back correctly. Passing revenue is key to measuring ROAS (return on ad spend) in GCM. Floodlight event tags must be modified to collect revenue and transaction ID from a website under the value parameter and transaction_id
<script>
gtag(‘event’, ‘purchase’, {
‘allow_custom_scripts’: true,
‘value’: ‘[Revenue]’,
‘transaction_id’: ‘[OrderID]’,
‘send_to’: ‘DC-123456/[activityGroupTagString]/[activityTagString]+transactions’
});
</script>
These values are set dynamically by the marketer’s ecommerce platform. To verify tags are collecting values properly, use the Tag Assistant. In some cases, GCM may also need to pass revenue data onto other tags, such as partner conversion tags. To do this, a user must configure the extra tag as a “Dynamic tag” within the Floodlight tag settings. This process is also referred to as ‘piggybacking’. If a piggybacked tag must also receive revenue or other data, their tag must be customized to use GCM Pattern Match macros. Pattern Match macros expand to pass a Floodlight value to a piggybacked tag. For example, if a marketer is collecting ‘cost’ in their Floodlight, they would use %pcost=!; in their piggybacked tag. When the value is recorded by Google, it will also pass to the partners tag:
<SCRIPT LANGUAGE=”JavaScript”>
var pub_cost=”%pcost=!;”;
var pub_prod=”%pu1=!;”;
var pub_prod_id=”%pu2=!;”;
var pub_ord_id=”%pord=!?”;
var item=0;
switch (pub_prod){
case “hotel_room”: item=1;
break;
case “flight”: item=2;
break;
case “car_rental”: item=3;
break;
case “time_share”: item=4;
break;
case “package”: item=5;
break;
default : item=0;
}
myImage=new Image();
myImage.src=’https://www.publisher.com/u?CAMPAIGNID=1234567&ORDERID=’+pub_ord+’&TYPE=89101112&ITEM=’+item+’&AMOUNT=’+pub_cost+’&QUANTITY=1&CURRENCY=GBP&METHOD=IMG’;
</script>
Learn how Claravine integrates into Google Campaign Manager and can help prevent many of the challenges listed above.


